This Chocolate Molten Lava Cake can be ready in about 20 minutes! It’s the perfect recipe for a date night, a girl’s night in, or even Valentine’s Day.
Valentine’s Day is all about chocolate, right? Some people think it’s about KISSES or your RELATIONSHIP or maybe even LOVE or APPRECIATION. Those people are crazy, because all the sane people know that Valentine’s Day is about chocolate first. Your significant other can come in a close second.
But good news, people! If you make this Chocolate Molten Lava Cake for your hunny on Valentine’s Day, they’re going to think the day is all about them, even though it’s really about the ooey gooey chocolate coming out of the center of that cake 😉
I love making this molten lava cake as a sweet dessert on Valentine’s Day, after serving my cheese fondue recipe as an appetizer! What’s Valentine’s Day without a few calories anyways?
What is Molten Lava Cake?
Is it cliche of me to say that Chocolate Molten Lava Cake is heaven? I think it is…. But, I mean, you can’t help the truth. If there’s chocolate molten lava cake on a menu at any given restaurant at any given time, you get bet your belly that that cake is going in my mouth.
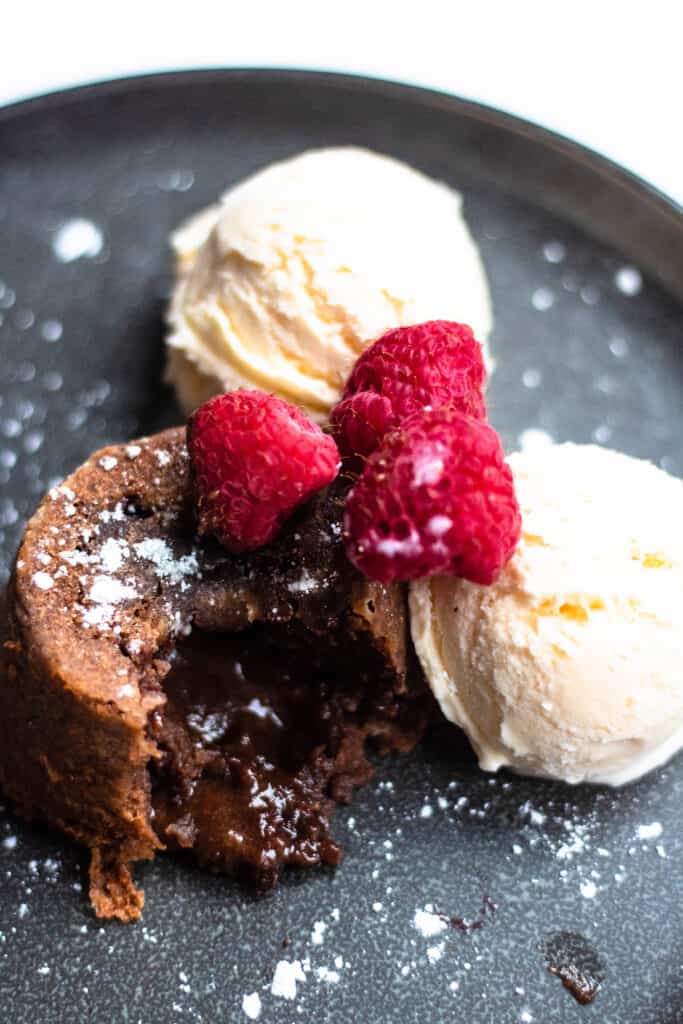
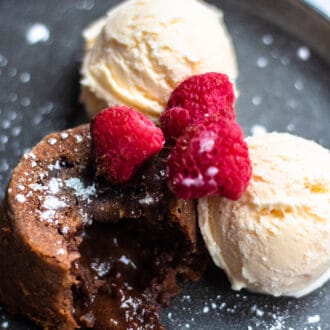
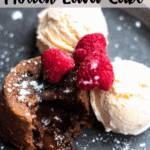
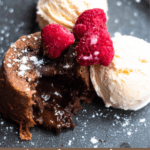
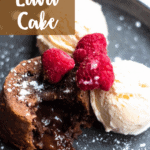
These chocolate molten lava cakes are perfect individual or shared desserts. Normally they are served warm and with ice cream. The real magic of this dessert comes when you use a fork to break open the center. Ooey gooey molten chocolate with flow from the center, mixing with the ice cream. It is a decadent and delicious dessert and so easy to make at home!

What Ingredients are in this Recipe?
Butter
Eggs
Egg yolks
Chocolate Chips
Flour
Sugar
Salt
How Do You Make Molten Lava Cake?
Heat to 425.
Use a cold stick of butter to rub butter on the interiors of 6 ramekins. Dump cocoa powder and each one, turning the ramekins until cocoa sticks to all the butter inside.
Create a double boiler on your stove. To do this, place a medium pot on a stove and fill it with water. Bring this water to a boil. Place a glass bowl on top of the pot so that the bottom is heated by the steam but is not touching the water.
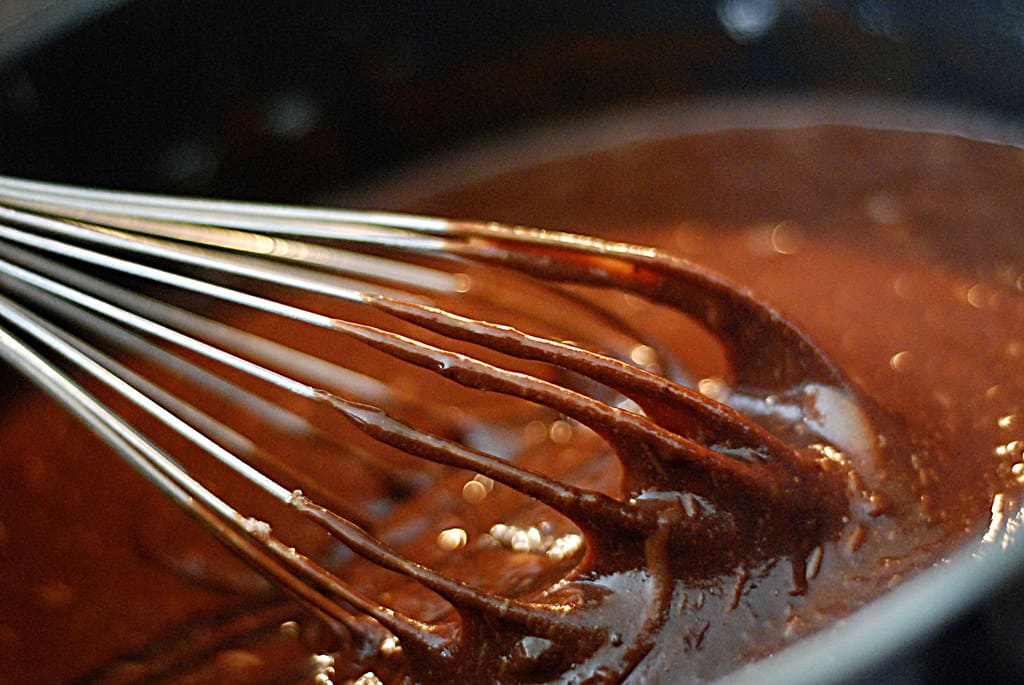
In the glass bowl of the double boiler, melt the butter. When melted, add the chocolate chips to the butter. Mix until the chocolate and the butter combine together.
In a separate bowl, mix eggs/egg yolks with sugar using an electric mixer. Use a wooden spoon to mix in butter/chocolate, flour, and salt until combined.
Pour into prepared ramekins and bake!
Read the recipe card below for full recipe measurements and baking time.
How to Make Molten Lava Cake without Ramekins
My home is filled with so many cooking and baking utensils, it’s not even funny. But even with my shelves so full they’re bending, I somehow don’t have any ramekins in my pantry?
Have no fear! Most people don’t have ramekins, not even myself. If you need a different way to bake your chocolate molten lava cake, you can use the muffin tin method!
Simply butter and cocoa the muffin tins instead of ramekins. Then, pour the batter into the muffin tins. I used a half-muffin tin sheet, and my recipe made 6 molten lava cakes exactly. Then bake according to the instructions
How Do You Know When Lava Cake is Done?
Your lava cakes will cook at different rates depending on how many you make and which method you choose to cook them in. Because of this, you’ll need to keep a close eye on your dessert to know when they’re ready to eat!
You’ll know your Chocolate Molten Lava Cake is ready when the edges are set but the middle still jiggles when you shake the ramekin. You should be able to see that the middle is still liquidy.
For me, this took about 9 minutes in the oven. When I first tested this recipe, I baked the cakes for about 14 minutes. They cooked all the way through, and, though delicious, they certainly weren’t molten.
The next time I baked this recipe, I checked on the cake every two or so minutes. Because they only took 9 minutes to bake, this wasn’t too bad! I found that my edges were baked but my middle was gooey at about 9 minutes.
How to Release the Molten Lava Cake from the Ramekins/Muffin Tin
Once your cakes are cooked the way you want them to be, remove them from the oven. Leave the cakes to rest for about 2 minutes in the tins. If you leave them for any longer, the tin/ramekins will continue to cook the center, which we certainly don’t want!
Before trying to remove the cake from the ramekins, run a butter knife around the outer edge of the cake. This will loosen the cake, making it easier to remove it from the tin.
To Remove the Lava Cake from Individual Ramekins
Place a plate over the ramekin with the cake still inside. Flip the plate over so that the ramekin is now sitting upside down on the top of the plate. Gently lift the ramekin off of the plate, leaving the chocolate molten lava cake inside. If you need some help, gently use a butter knife to loosen the cake.
To Remove the Lava Cakes from One Large Muffin Tin
Place a cookie over the muffin tin with the cakes still inside. Flip the cookie sheet over so that the muffin tin is now sitting upside down on the top of the cookie sheet. Gently lift the muffin tin off of the cookie sheet, leaving the chocolate molten lava cakes inside. If you need some help, gently use a butter knife to loosen the cakes.
How to Eat Molten Lava Cake
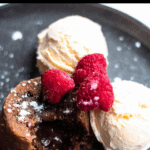
The most important part about eating this Chocolate Molten Lava Cake is that it’s warm. My favorite way to top the cake is with ice cream and raspberries. If you’d prefer, you can add hot fudge, caramel, peanut butter, marshmallow creme, or anything else your brain can come up with!
Can you Reheat Chocolate Molten Lava Cake?
Of course! If you want the best experience with your cake, eat it fresh out of the oven. The molten lava cake is always most delicious fresh. However, if you have extra or somehow (*gasp*) missed the first batch of lava cakes, you can always reheat them!
My favorite way to reheat my molten lava cake is just by putting it in the microwave for about 15 seconds. If you heat the lava cake for too long, the microwave will cook the middle of the cake. In order to successfully heat up the cake, make sure to only microwave it until it just warms. This will maintain the excellence of the cake while still eating it on the second day!
Does Molten Lava Cake Need to be Refrigerated?
Yes, if you are saving your molten lava cake for another day, make sure to keep it in the fridge. Because the inside is just batter, it is most safe when kept cool in the fridge. Follow the above instructions to reheat your lava cake before eating.
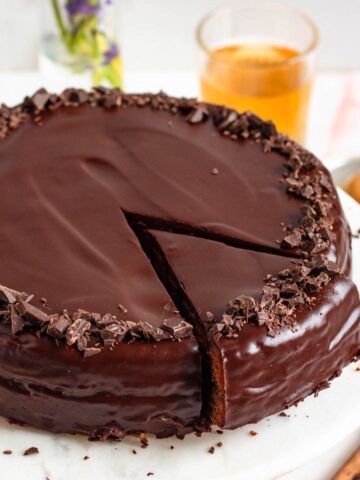
Did you like this recipe? If so, make sure to check out some of my other Valentine’s Day Recipes, features below:

Chocolate Molten Lava Cake
Equipment
- Muffin Pan
- Oven Mitt
- Electric Hand Mixer
- Mixing Bowl(s)
- Pot(s)
- 6 oz Ramekins
- Ice Cream Scoop
Ingredients
- ½ cup 1 stick butter + extra for coating ramekins
- Cocoa powder, for coating ramekins
- 6 oz chocolate, chips or chopped
- 2 eggs
- 2 egg yolks
- ¼ c sugar
- ¼ c flour
- ⅛ tsp salt
Instructions
- Heat oven to 425 degrees Fahrenheit.
- Use a stick of cold butter to coat 6 ramekins or 6 muffin tins with butter. Dump cocoa powder into each, and tilt the ramekin/tin until cocoa coats the entire thing.
- Create a double boiler on your stove. To do this, place a medium pot on a stove and fill it with water. Bring this water to a boil. Place a glass bowl on top of the pot so that the bottom is heated by the steam but is not touching the water.
- Melt the butter in the glass bowl. When melted, add the chocolate pieces. Stir together until chocolate is completely melted and combined with the butter.
- In a separate bowl, use an electric mixer to combine eggs, egg yolks, and sugar.
- Hand mix in chocolate/butter mixture, salt, and flour.
- Pour into prepared ramekins. Place in the oven and cook for about 9 minutes, until edges are set, but the middle still jiggles when shaken.
- Remove from oven and allow to rest for two minutes before turning onto a plate. Serve with ice cream and raspberries.
- Leave a comment on this post letting me know what you thought!


Justin says
Hevenly cake
Alexandria Drzazgowski says
So glad you enjoyed it, Justin! Thanks for leaving a review and rating 🙂